Home →
Getting Started →
Setting up your team →
Adding a Team Member
2.3. Adding a Team Member
As the Account Owner you may add Team Members in your agency. Team members with 'Administer Account' access may edit/update team members details.
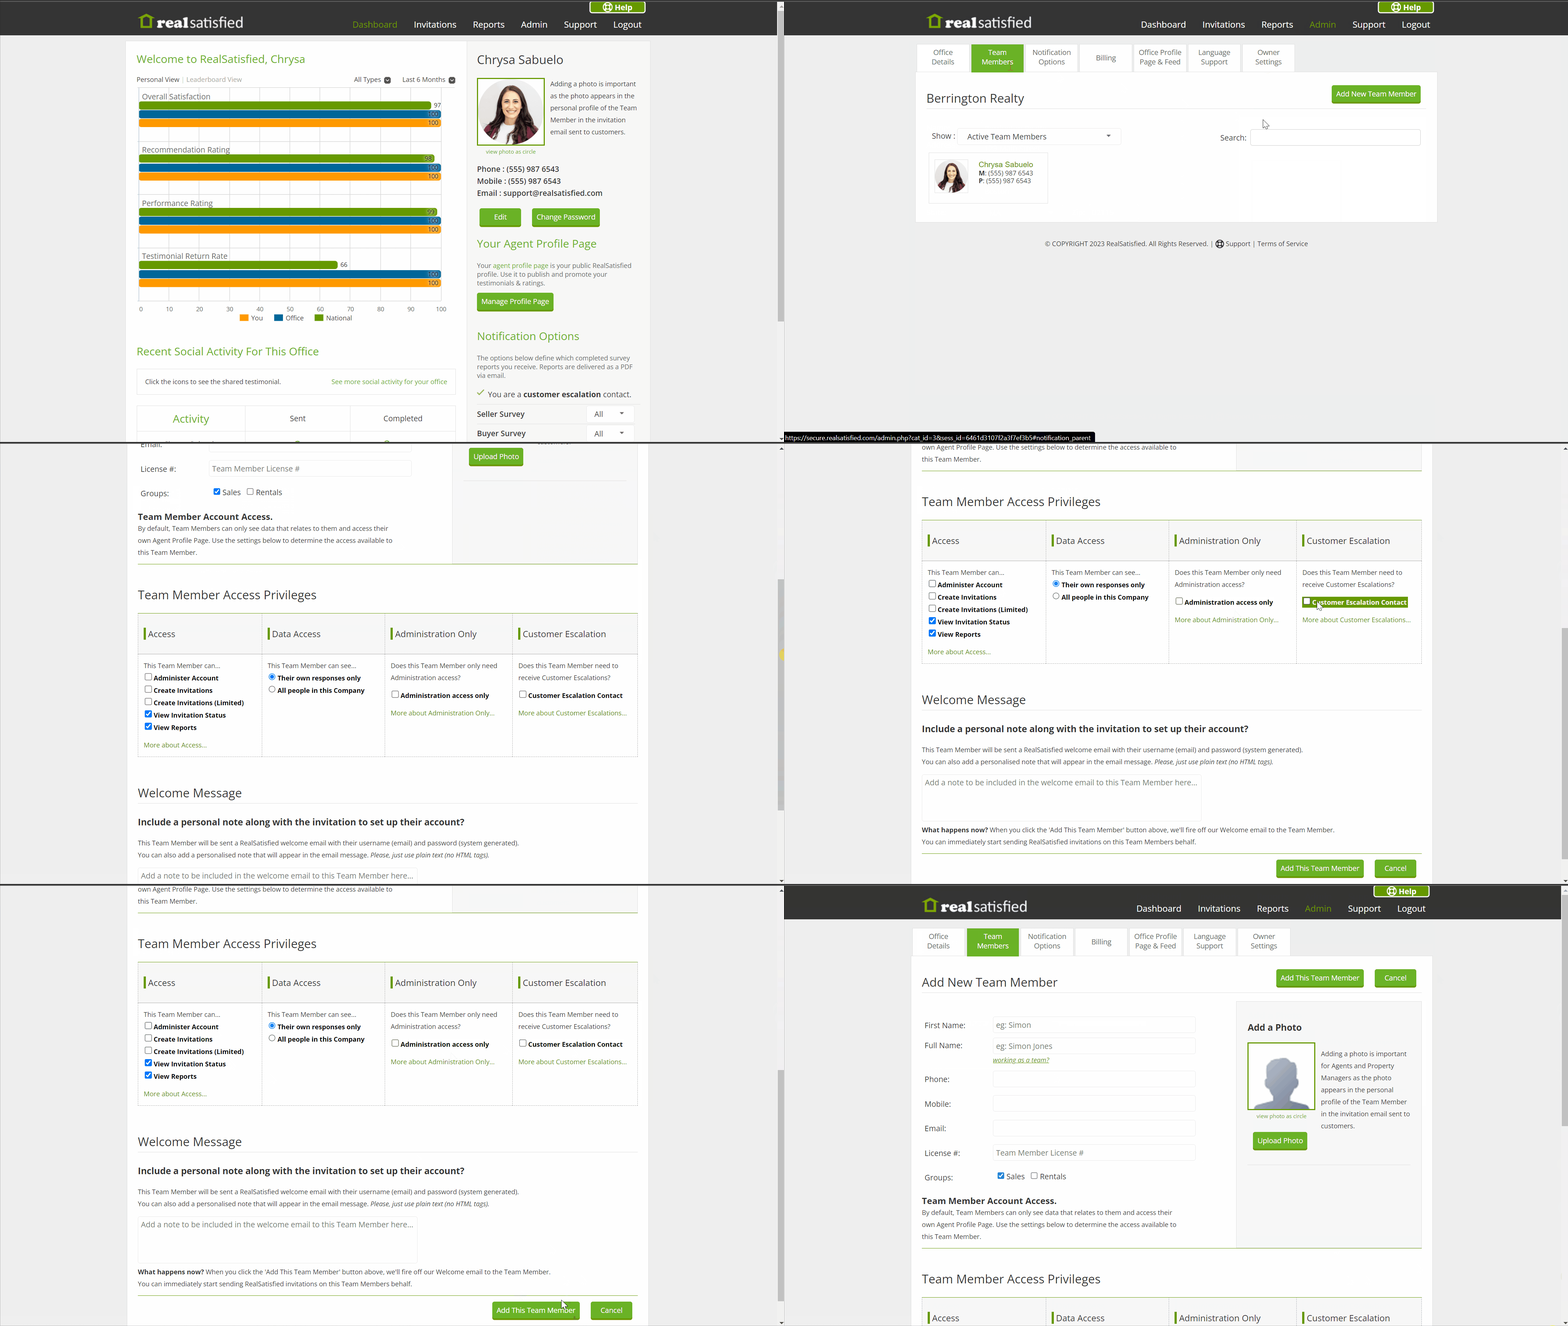
Simply click 'Admin' on the main menu to be presented with the 'Agency Details' tab. Select 'Team Members' to see all of your team members. Account Owners will see a 'Add New Team Member' button on the top right.

To edit a Team Member just click on their profile. This will take you to the Team Member edit screen. Edit details as required and then press 'Save Details' or press 'Cancel' to exit back to the Team Members list without saving changes.
- All details in the top panel (First name, Surname, Mobile, Phone & Email) are required for all team members. A photo is optional, but strongly recommended. Where a photo is not used the 'gray avatar' will display in invitation emails and survey thank you pages.
- Groups: This sets the surveys that the Team Members have access to. Simply check the boxes next to either Sales, Rental or both.
- Survey Language: by default, English will be set as the survey language. You can change this anytime. Note that email invitations sent prior to the change being made will continue to show the same language as they were when the invitation was sent.
In the Team Member Access Privileges, there are 4 groups of settings :

1. Access: This sets the privileges that this Team Member has (essentially setting what they can and can't do in the system).
-
- Administer Account - Can do everything except owner specific tasks. Suitable for someone that administers the system on behalf of your agency.
- Create Invitations - Can create new invitations for any of the surveys they have access to in Activity access, this also implies that they have 'View Invitation Status'. Whether they may send invitations for just themselves or on behalf of all other other Team Members will depend on their 'Data Access'.
- Create Invitations (limited) - limits send access on the Agent Dashboard to surveys to those that are typically not API automated. Buyer and Seller surveys are not included with this access
- View Invitation Status - Can view the status of invitations, but cannot create new invitations. Whether they may view invitation status for just themselves or for all other Team Members will depend on their 'Data Access'.
- View Reports -No invitation access at all, this is a reporting only access. Whether they may view reports for just themselves or for all other Team Members will depend on their 'Data Access'.
2. Data Access: This sets the data that this Team Member can see.
-
- Their own responses only - with this selected the Team Member only has access to view their own data in the system.
- All people in this Agency - with this selected the Team Member has access to view data for all Team Members.
3. Administration only - team Members that administer RealSatisfied for your office and don't require invitations to be sent on their behalf or to be included in reports can be identified by checking this box.
4. Customer Escalation Contact - team members set as a Customer Escalation contact will receive messages relating to dissatisfied survey respondents that wish to be contacted by office management. While we recommend having more than one Team Member set, a minimum of one is required.
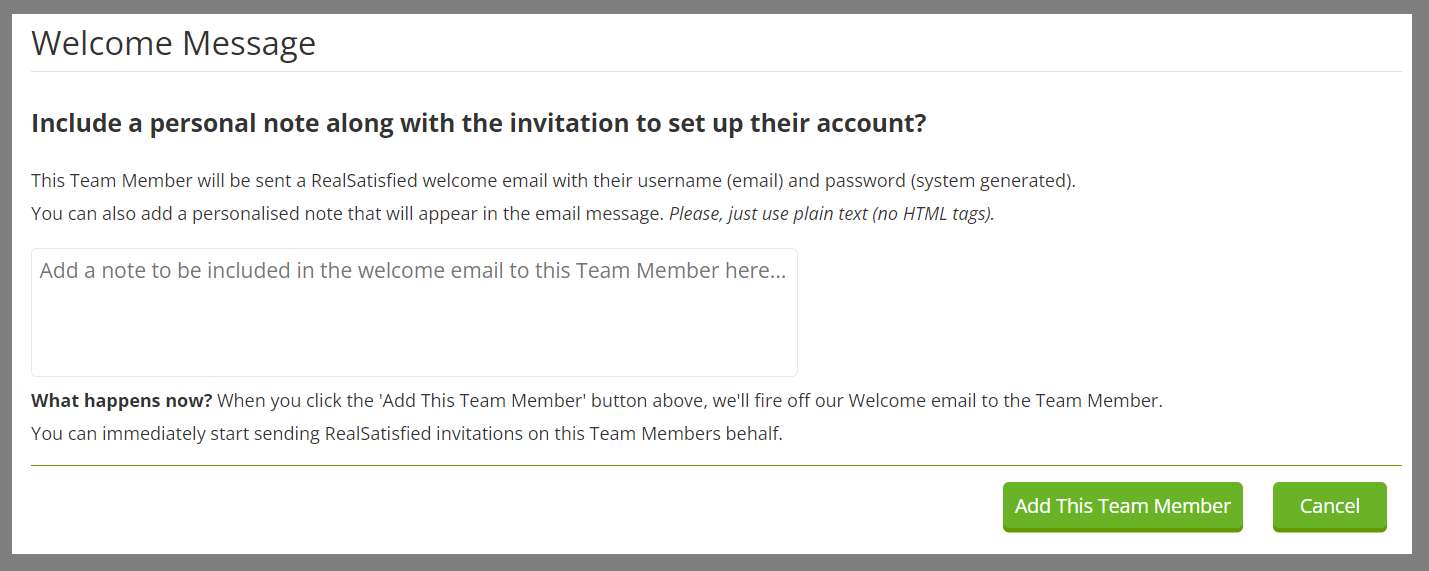
Welcome message: when a new Team Member is added, they are sent a welcome message with details on how to sign in to RealSatisfied. You may add a personal note to this message, and in the case of editing, resend a message with a personal note.

